Elasticsearch backup to AWS S3 via Kibana
I'm terrified of racking up big bills with AWS so I don't work a lot with it, aside from Amazon Simple Email Service (SES). For my ElasticSearch 7.14 cluster that I run alongside with Kibana, I wanted to setup Snapshot and Restore.
My understanding was that with Snapshots, you obtain a copy of your cluster data at that point and you can restore it when you would like to. I already had an AWS account setup before starting with this. For this, you needed to setup a storage repository and then configure via Kibana.
This is how I went about it.
- Create a S3 Bucket (this is the storage repository we will use with Elasticsearch)
- Create an AWS policy to allow the IAM User to access the S3 Bucket
- Create an IAM User and attach the policy we created
- Install the S3 Repository Plugin
- Register the repository with Kibana
- Setup an automatic policy with Kibana / Elasticsearch so it backs up data via cron
Create a S3 Bucket
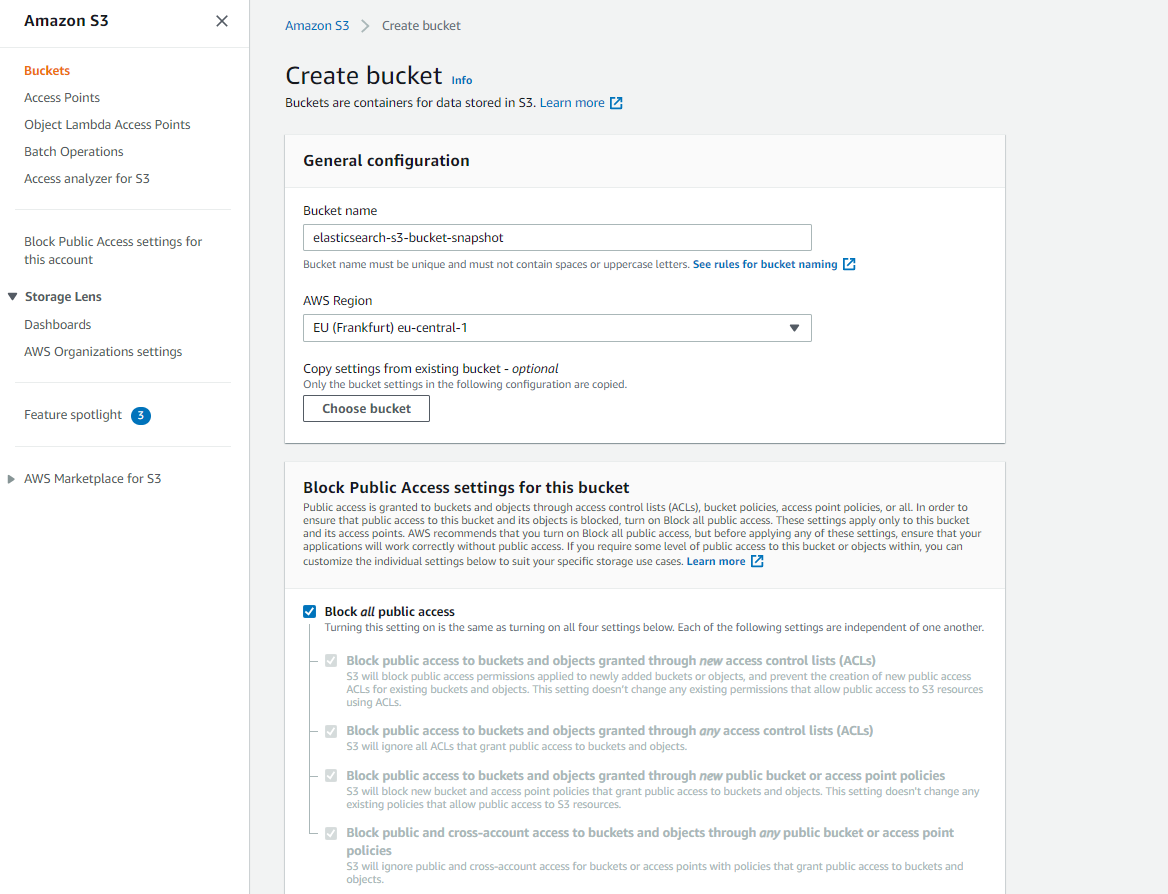
- Open AWS Console -> S3 -> Create Bucket
- Enter a bucket name: elasticsearch-s3-bucket-snapshot, other defaults are good - make sure you select "Block all public access" and then go ahead with creating the bucket (or saving)
Create an AWS policy
- Open AWS Console -> IAM -> Policies
- Click on "Create Policy"
- Switch to JSON editor and paste the following policy (that Elasticsearch recommends for S3 permissions)
{
  "Statement": [
    {
      "Action": [
        "s3:ListBucket",
        "s3:GetBucketLocation",
        "s3:ListBucketMultipartUploads",
        "s3:ListBucketVersions"
      ],
      "Effect": "Allow",
      "Resource": [
        "arn:aws:s3:::snaps.example.com"
      ]
    },
    {
      "Action": [
        "s3:GetObject",
        "s3:PutObject",
        "s3:DeleteObject",
        "s3:AbortMultipartUpload",
        "s3:ListMultipartUploadParts"
      ],
      "Effect": "Allow",
      "Resource": [
        "arn:aws:s3:::snaps.example.com/*"
      ]
    }
  ],
  "Version": "2012-10-17"
}
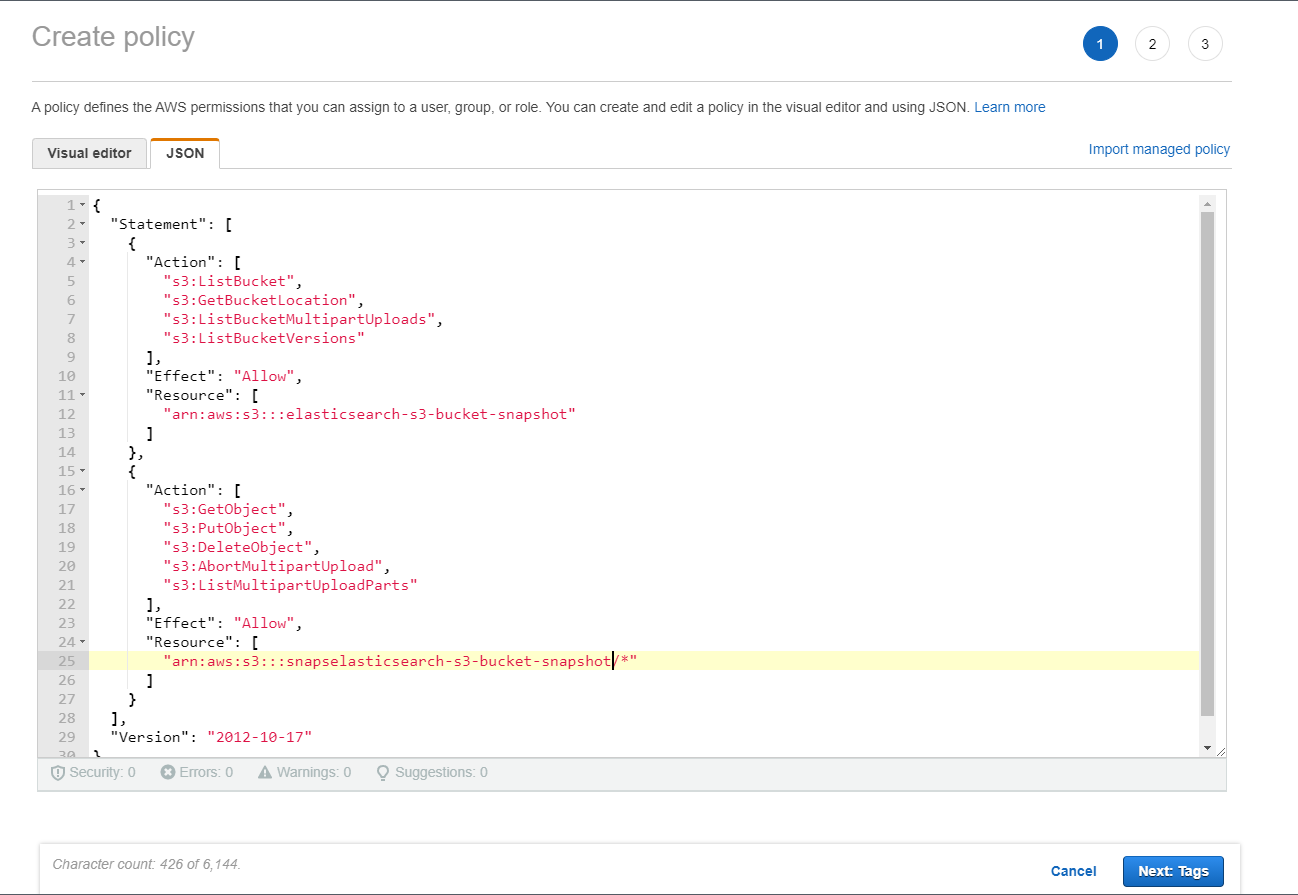
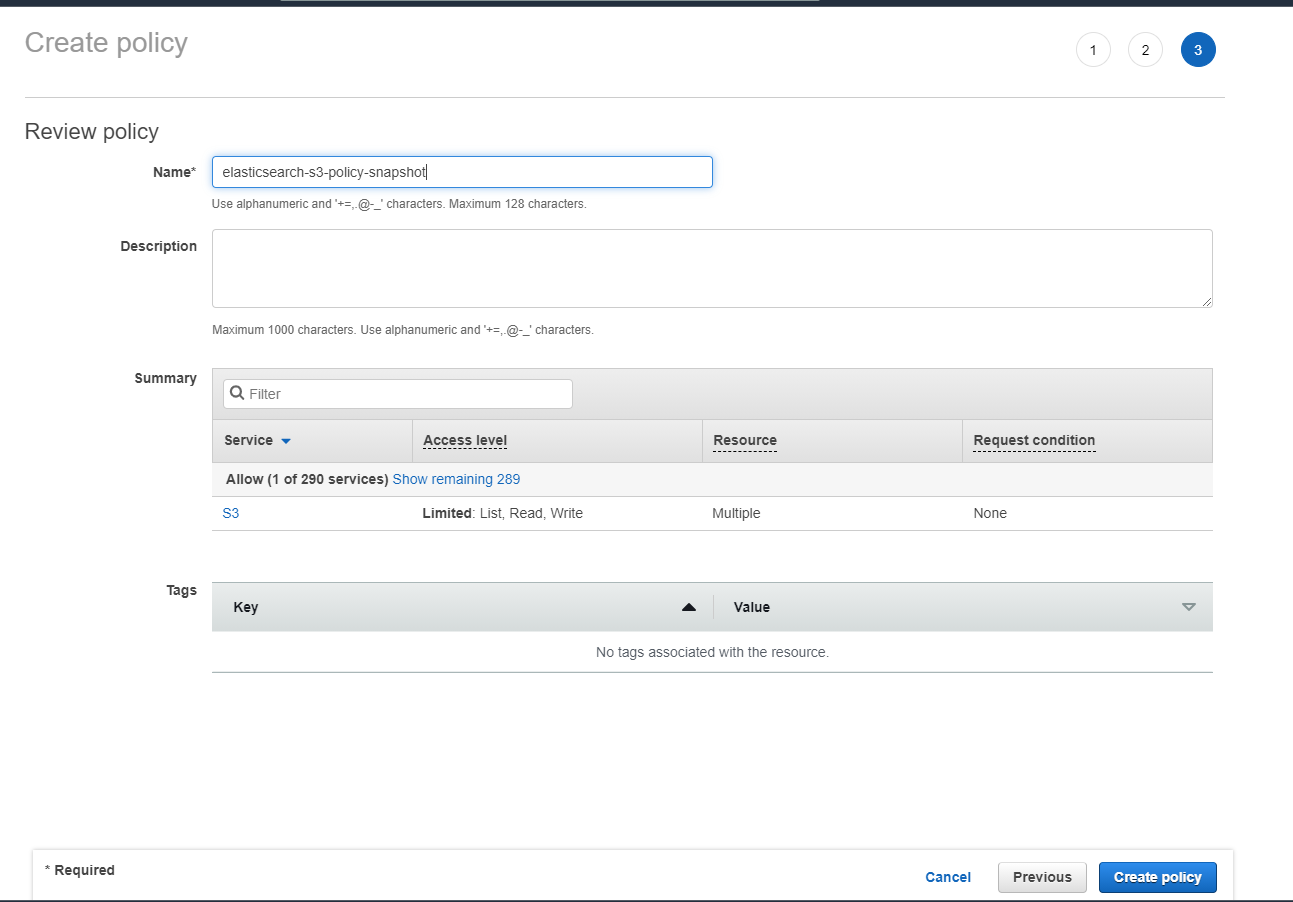
- Click on "Next: Tags", tags can be default so click next again
- Enter a policy name elasticsearch-s3-policy-snapshot and hit "Create policy"
Create an IAM User
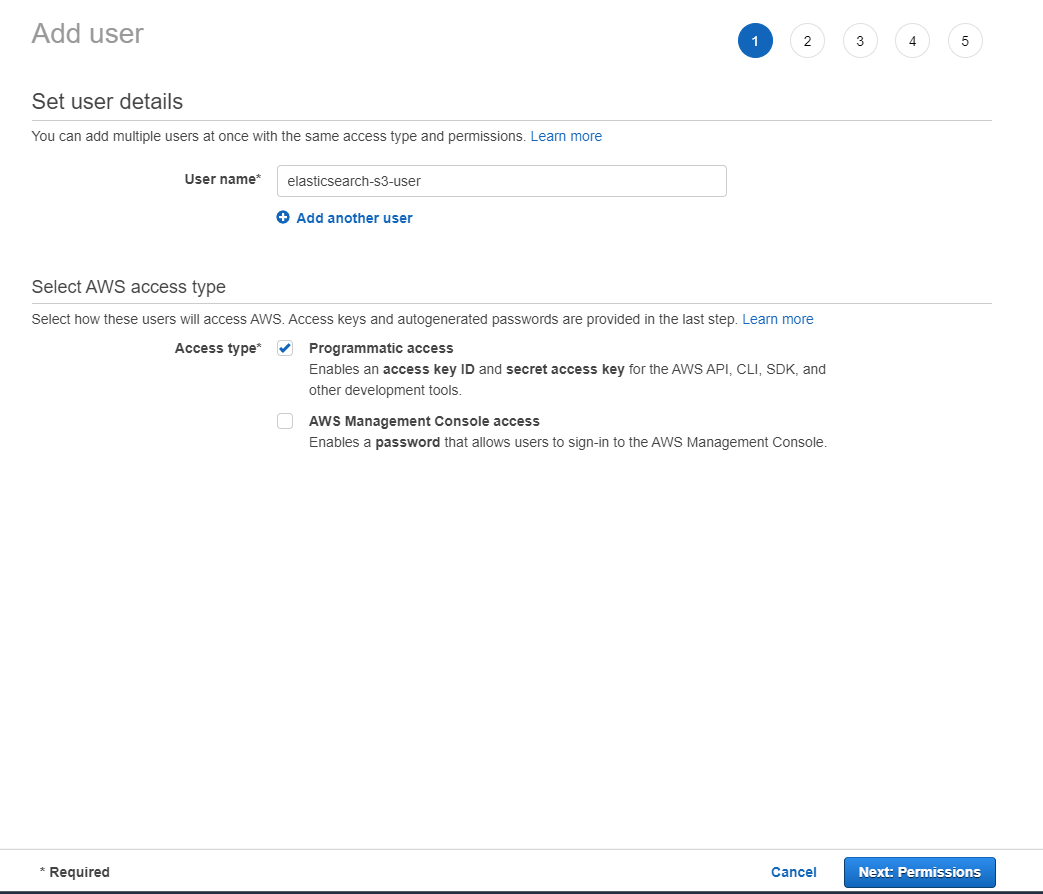
- Open AWS Console -> IAM -> Access Management -> Users
- Click on "Add Users"
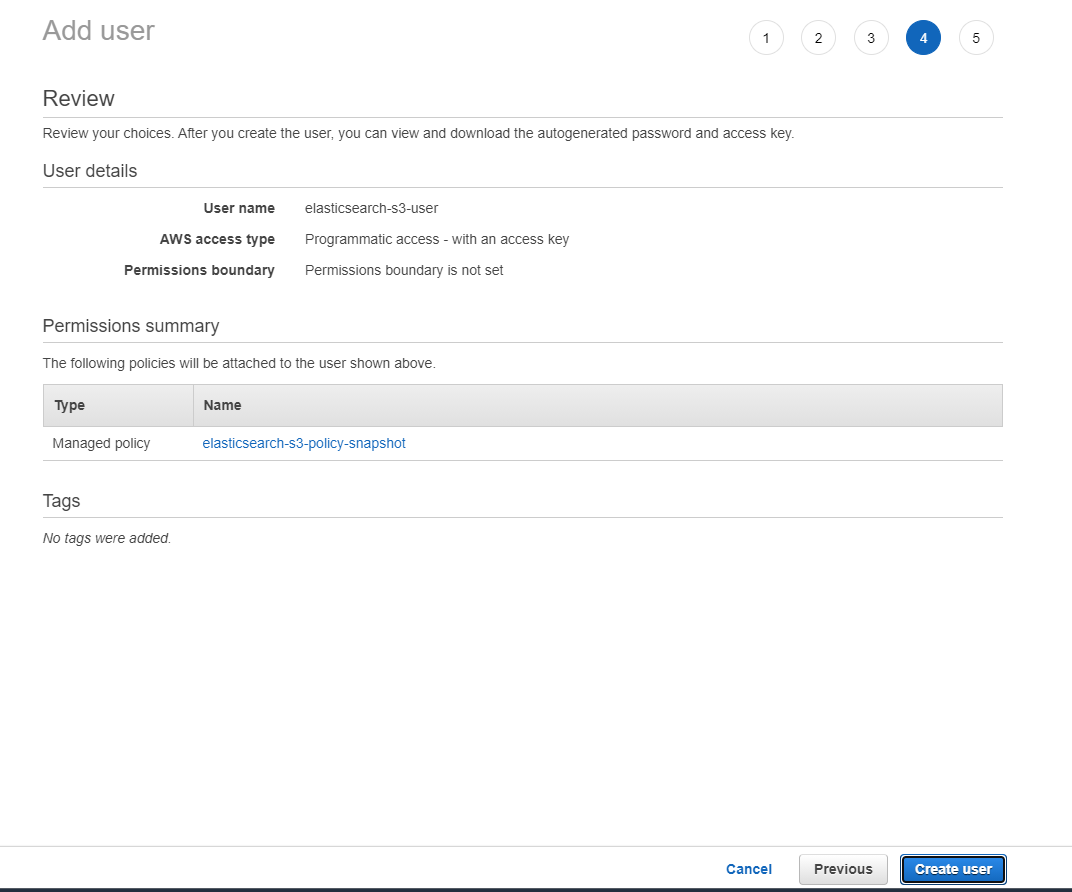
- Enter an user name elasticsearch-s3-user (customizable), check Programmatic access and click Next: Permissions
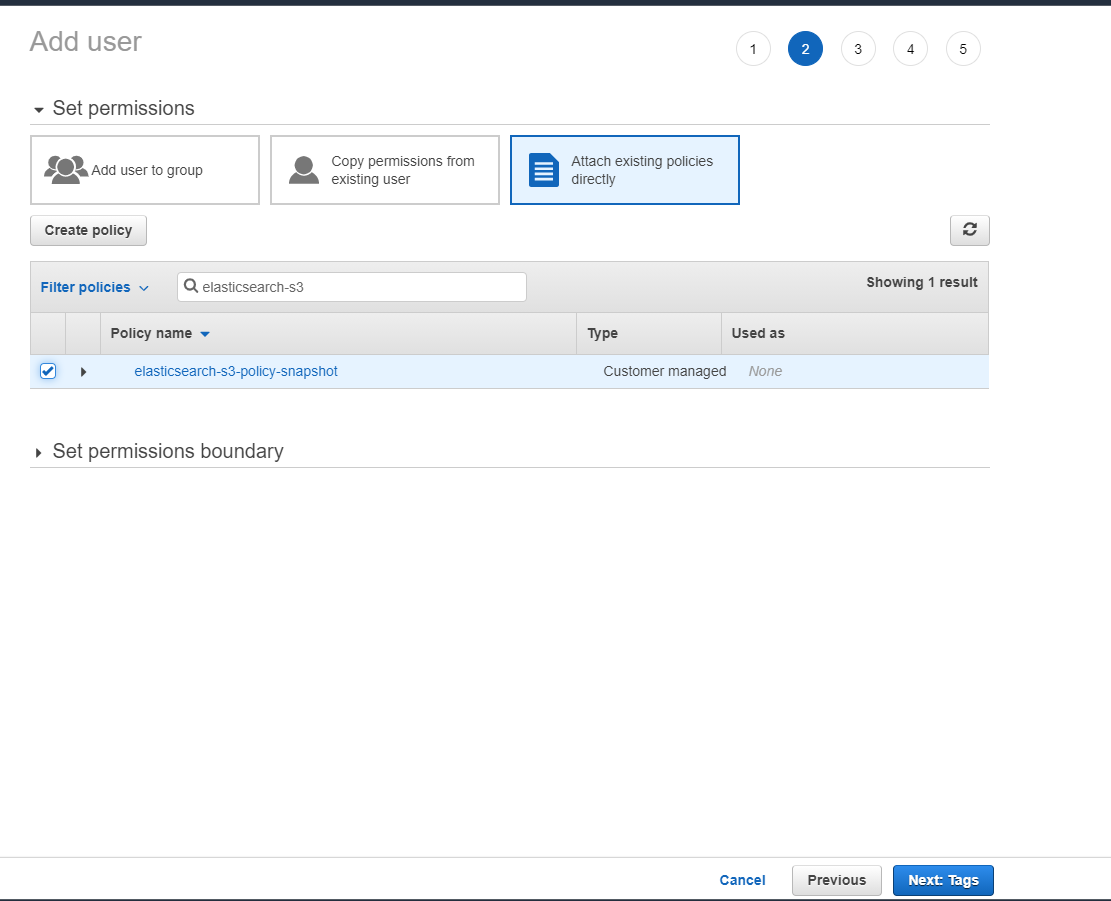
- Switch to "Attach existing policies directly" , search and select "elasticsearch-s3-policy-snapshot"
- Click "Next: Tags", defaults are fine. Review the details and click Create User.
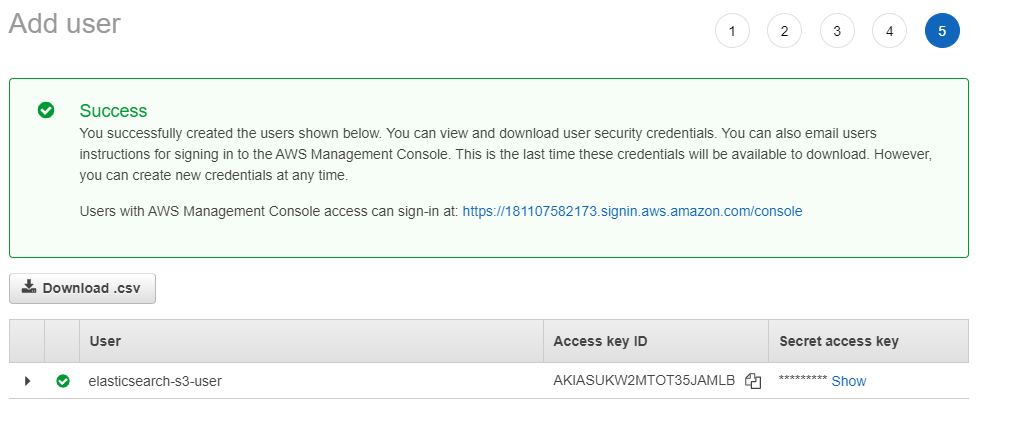
- This will generate a "Access Key ID" and "Secret access key" - both of which we will need soon to setup repository in Kibana, so keep them handy. There's a CSV option to download.
Install the S3 Repository Plugin
NOTE: With Elasticsearch version 8, the steps have changed: https://www.elastic.co/guide/en/elasticsearch/reference/8.5/repository-s3.html
- On your machine or server, go to where the Elasticsearch bin folder is. Mine was at /usr/share/elasticsearch
- Run
sudo bin/elasticsearch-plugin install repository-s3, answer with y or Y when asked about permissions - Restart your cluster!
- We will configure the client settins for the plugin. Using elasticsearch-keystore, set the credentials for your IAM User
bin/elasticsearch-keystore add s3.client.default.access_key
# enter your "Access Key ID", hit enter
bin/elasticsearch-keystore add s3.client.default.secret_key
# enter your "Secret Access Key", hit enter
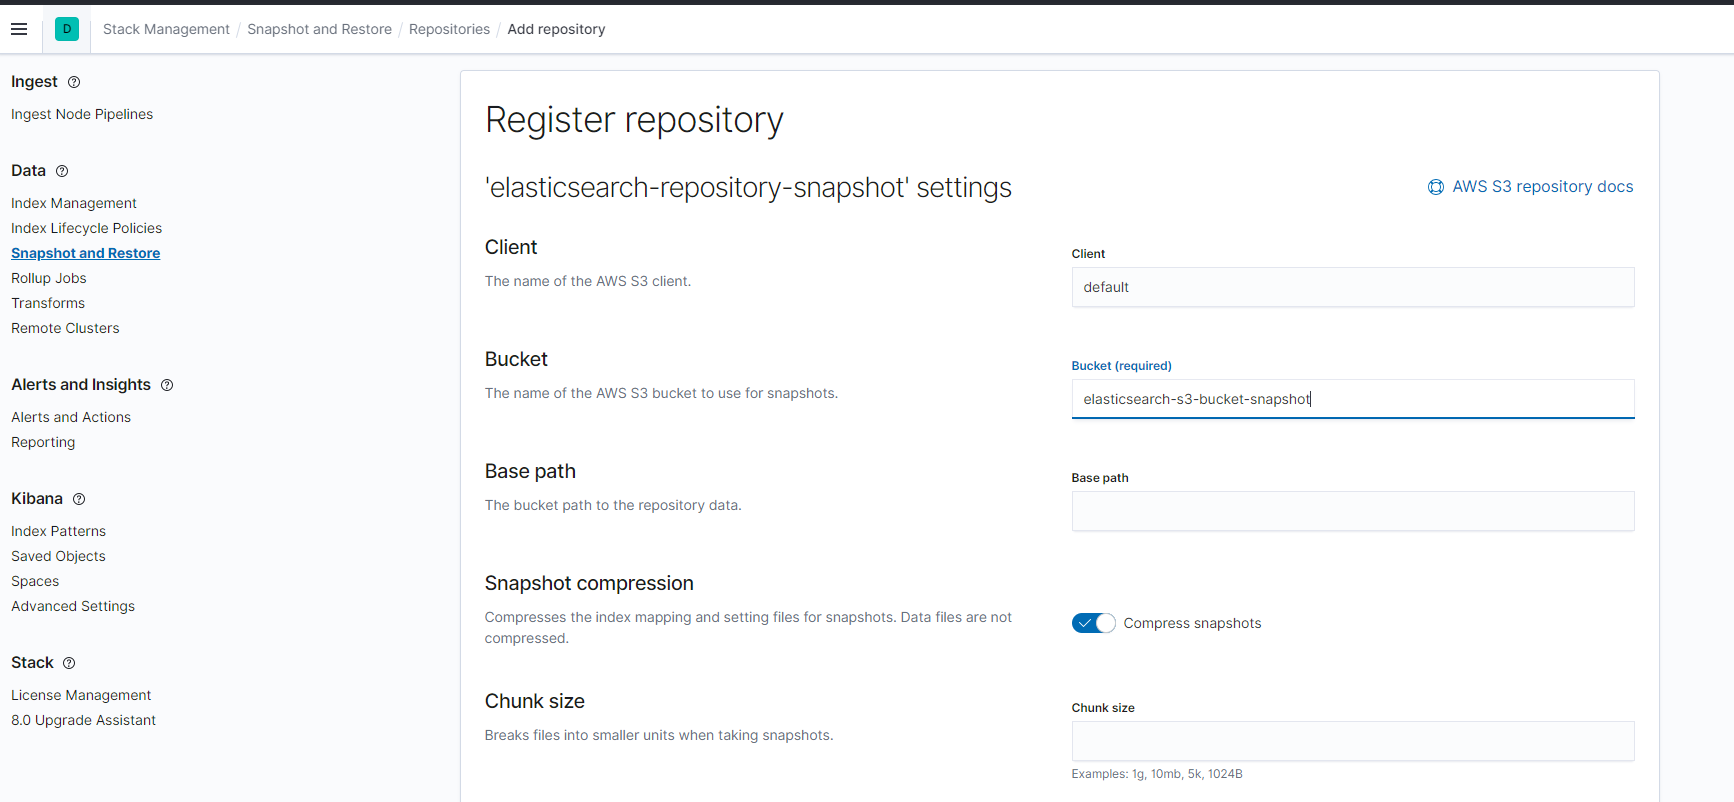
Register the repository with Kibana
- Go to your Kibana dashboard -> Management -> Stack Management -> Snapshot & Restore -> Repositories -> "Register a repository"

- Name it as elasticsearch-repository-snapshot, select AWS S3 as repository type, click Next. If you don't see AWS S3, make sure that you restarted your cluster!
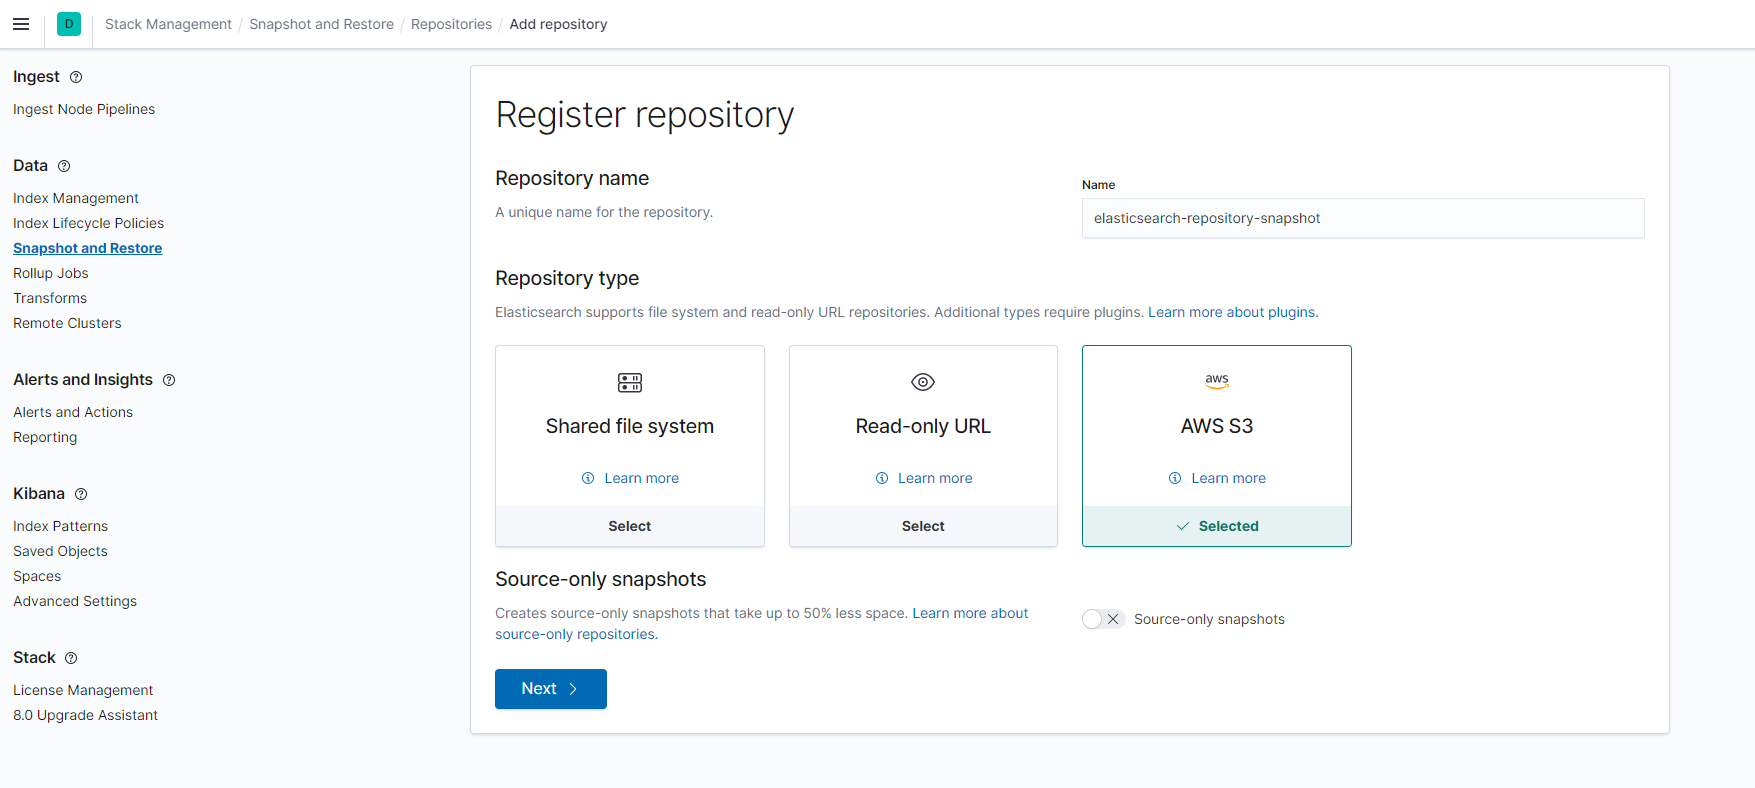
- Client name is default (this is part of your keystore secrets s3.client.default.access_key) and your S3 Bucket Name. Review other defaults and hit Register.
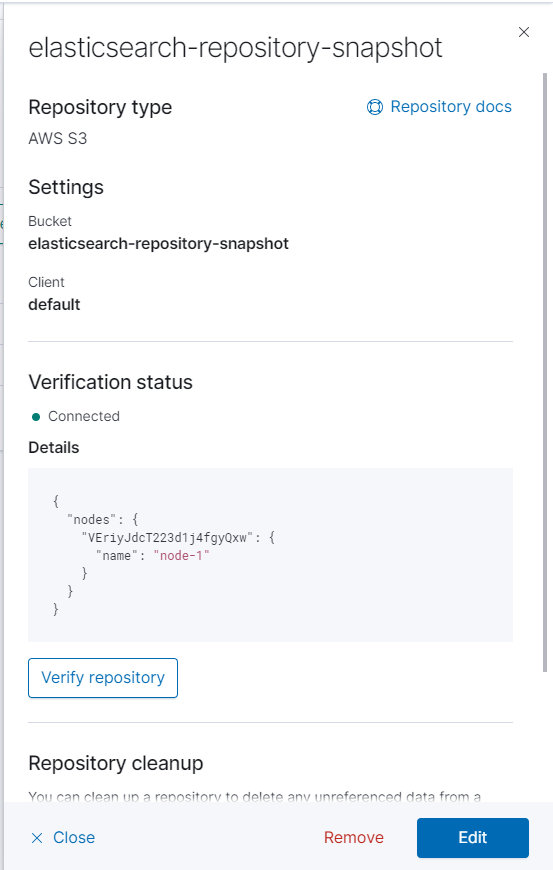
- Once this is done, it pops up a details screen for the repository. Click on Verify repository
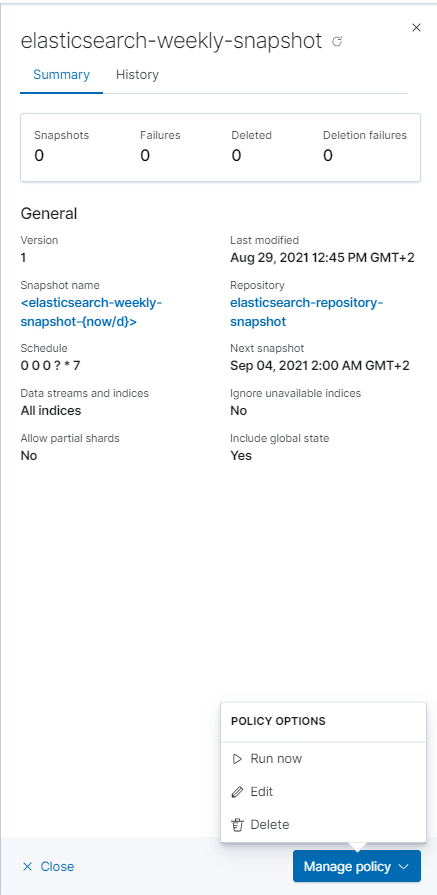
Setup an automatic policy with Kibana
With Kibana, you can setup automatic backup for your indices.
- On the same screen, switch to Policies -> Create Policy
- Enter these details
- elasticsearch-weekly-snapshot as the name
- <elasticsearch-weekly-snapshot-{now/d}> as the snapshot name, appends the date at the end
- Select elasticsearch-repository-snapshot
- Set frequency to every week
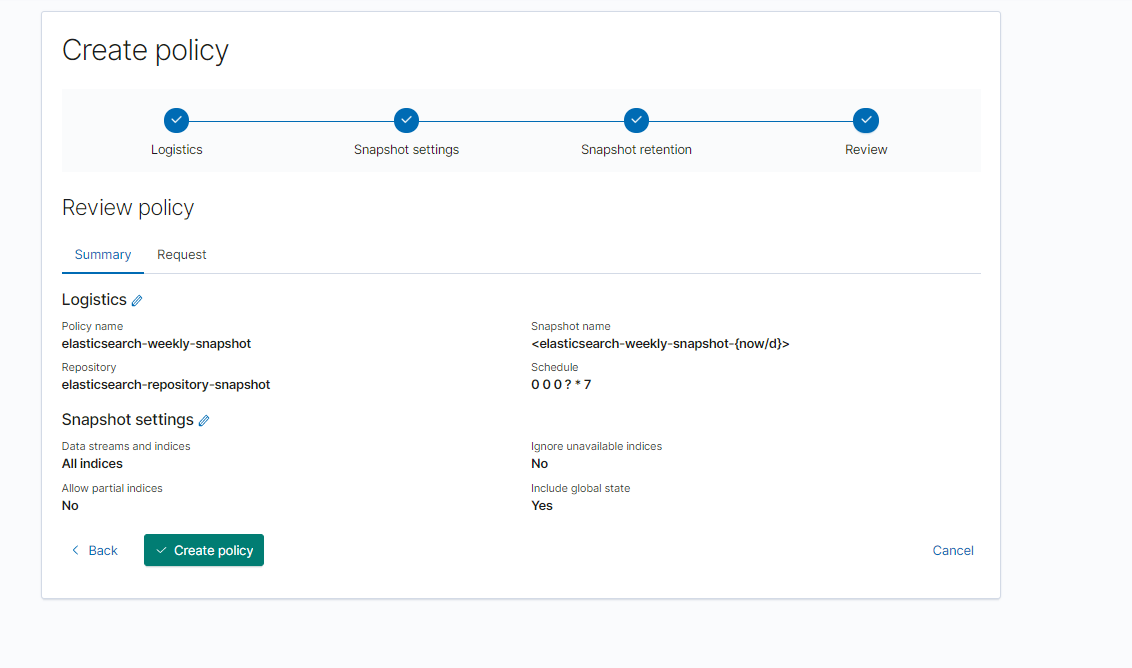
- Click Next
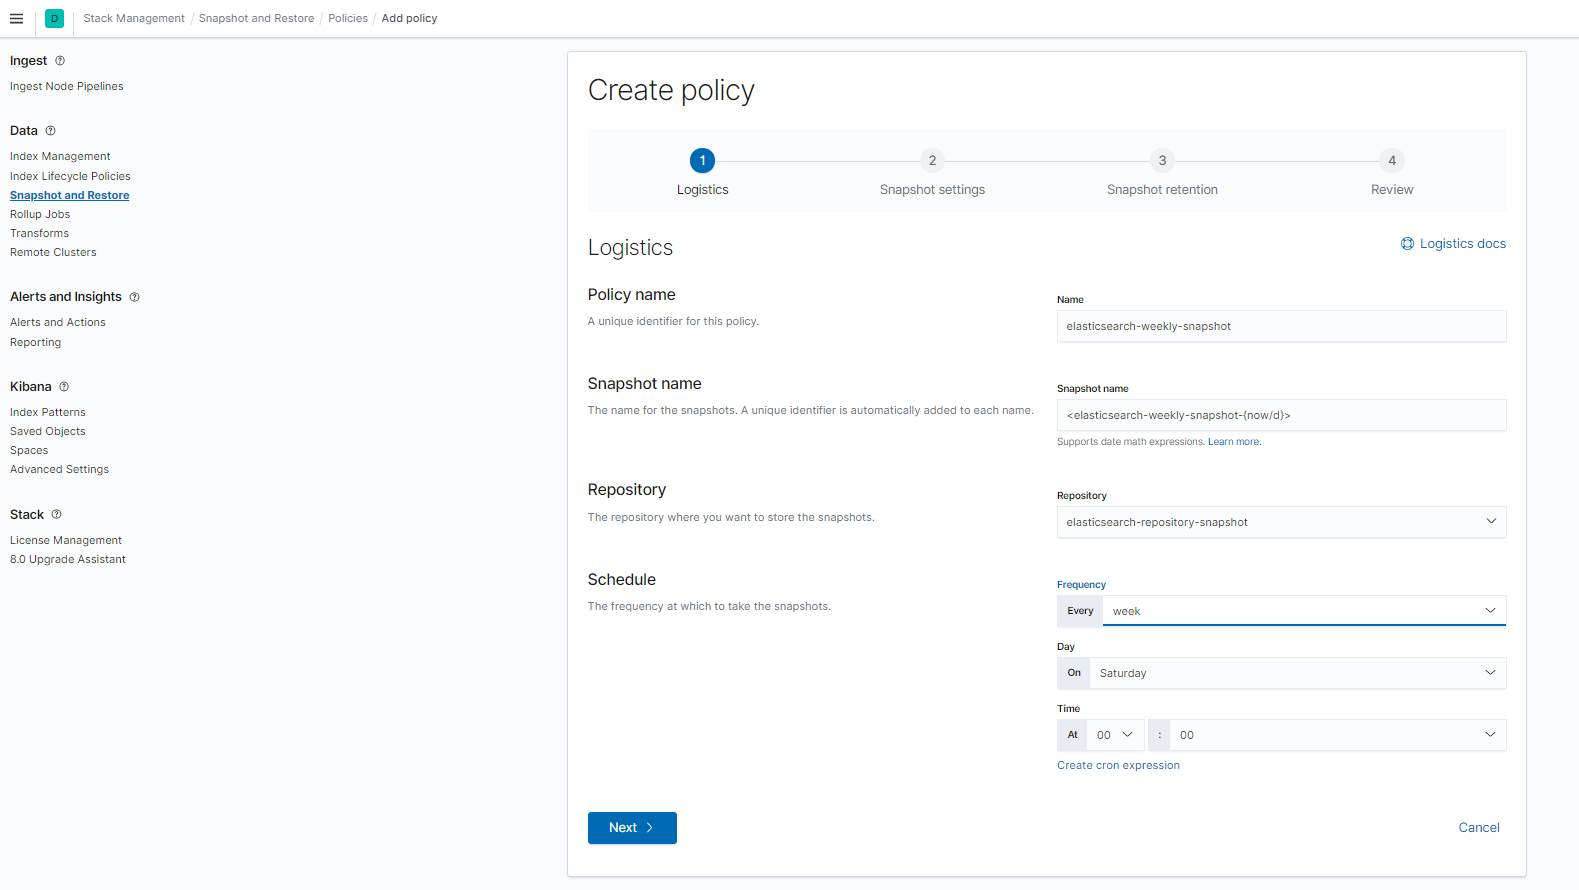
- Click Next, and on review screen, hit Create Policy
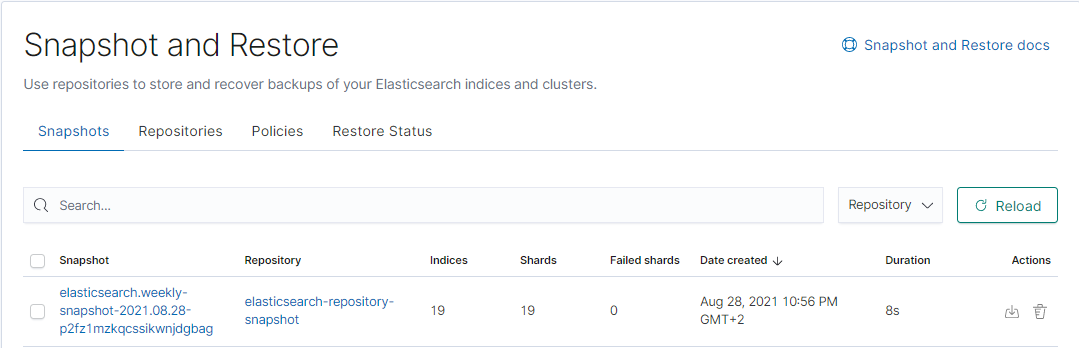
- You can run the policy and when it's done, you will see the snapshot
- You should see something like this once snapshot is complete
To setup PHP and Elasticsearch using API key, read more about it